Amazon Web Services (AWS) is now widely used in companies around the world. It is a secure cloud services platform offering compute power, database storage, content delivery and other functionalities to help businesses scale and grow.
AWS offers a broad set of global compute, storage, database, analytics, application, and deployment services that help organisations move faster, lower IT costs, and scale applications.
AWS Cloud spans 57 Availability Zones within 19 geographic regions worldwide, with announced plans for 15 more Availability Zones and five more Regions. It provides end-to-end IT solutions for both small and big scale organisations.
Today I will show you one of the fundamental yet necessary processes:
A detailed step-by-step guide on how to create a Virtual Machine in AWS through Powershell, which you can plug into any CI tool (I have used Jenkins in this guide).
Why to create AWS VM through PowerShell?
You might ask:
When there is a wonderful GUI available within the AWS EC2 Dashboard to provision a Virtual Machine, what’s the need to create an AWS VM through PowerShell?
Well, it depends on the requirements.
I had a requirement where I needed to provision VMs through the CI tool so that my user had to use only one Interface – which is “Jenkins” – for the whole CI-CD stuff, which starts from creating VM.
Hence I have used PowerShell and used that script in my Jenkins job to provision the VM within minutes.
Get the AMI name that will be used to create VMs.
Let me explain what actually this Image (AMI) means and how it is beneficially used :
AWS Machine Images, aka AMIs, are used to provide a new virtual machine with an operating system. It would be a replica of an existing VM with the same OS, Memory, Data, Applications, Tools already loaded. An image might also have one or more data disks.
It is useful when you want to create the same machine to avoid the saying “It just works on my machine“, which is helpful in today’s leading world. You can create multiple VMs sequentially or parallel based on your requirements with just one image, such as Dev Environment, Test Environment, Stage Environment, QA Environment and so on…
So the first step is “Adding your AWS account in the PowerShell.”
To do that – You need to configure AWS on your PowerShell.
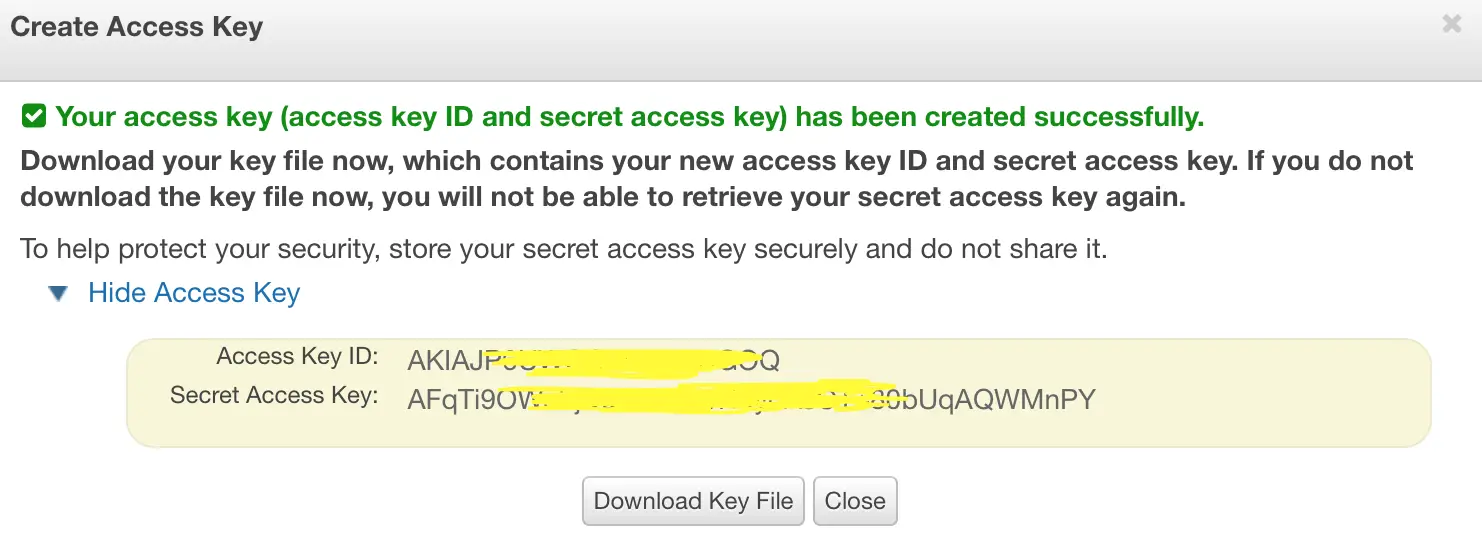
You need to provide AWS Access Key ID and Secret Access Key, which you can fetch by following the below process.
Log in to your AWS Management Console.
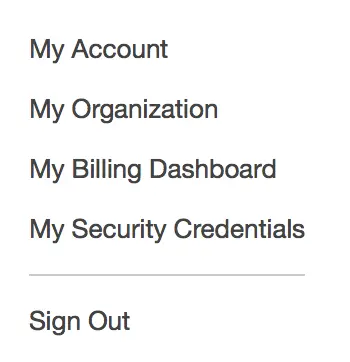
Click on your user name at the top right of the page.

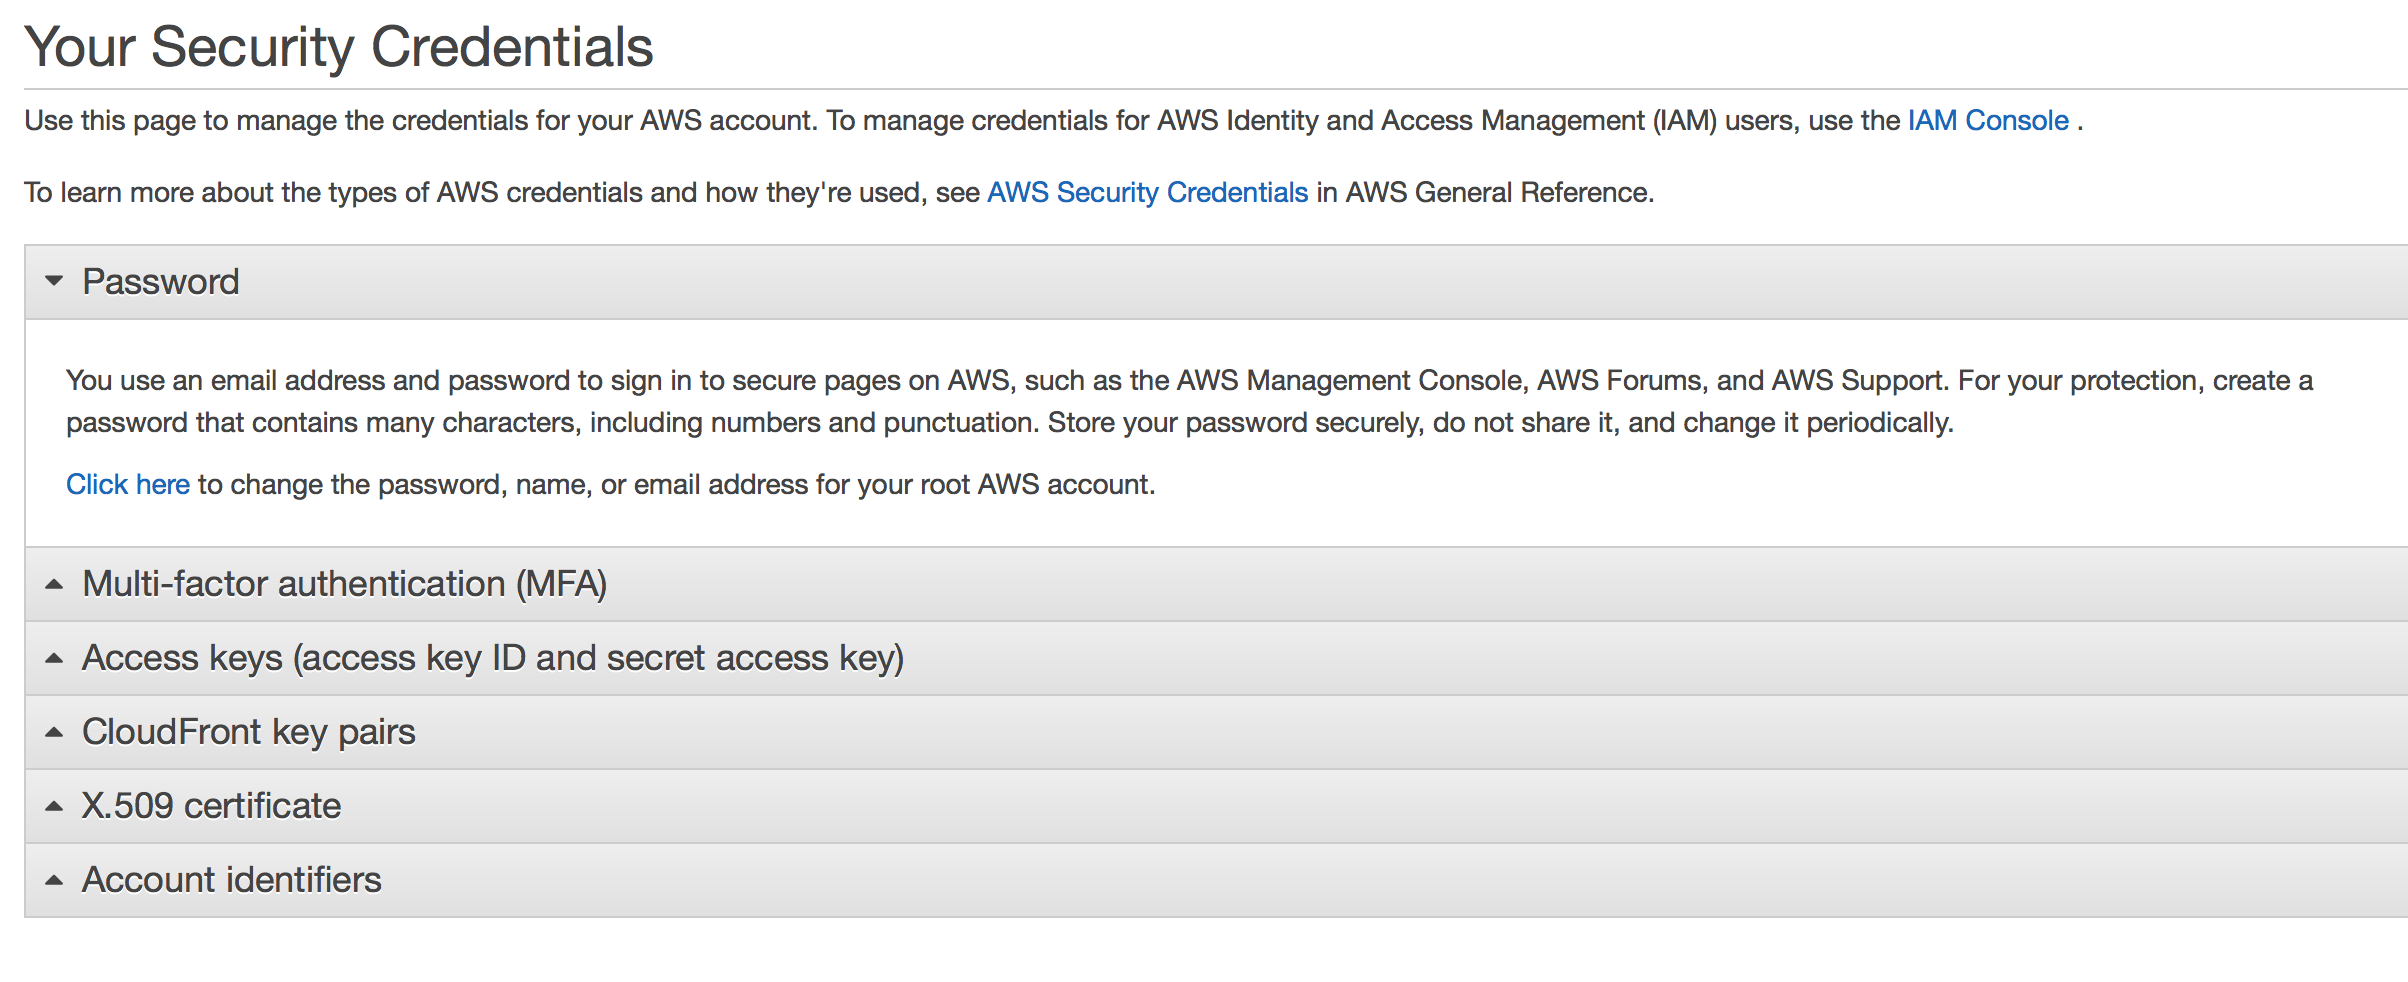
Click on the ‘My Security Credentials’ link from the drop-down menu.

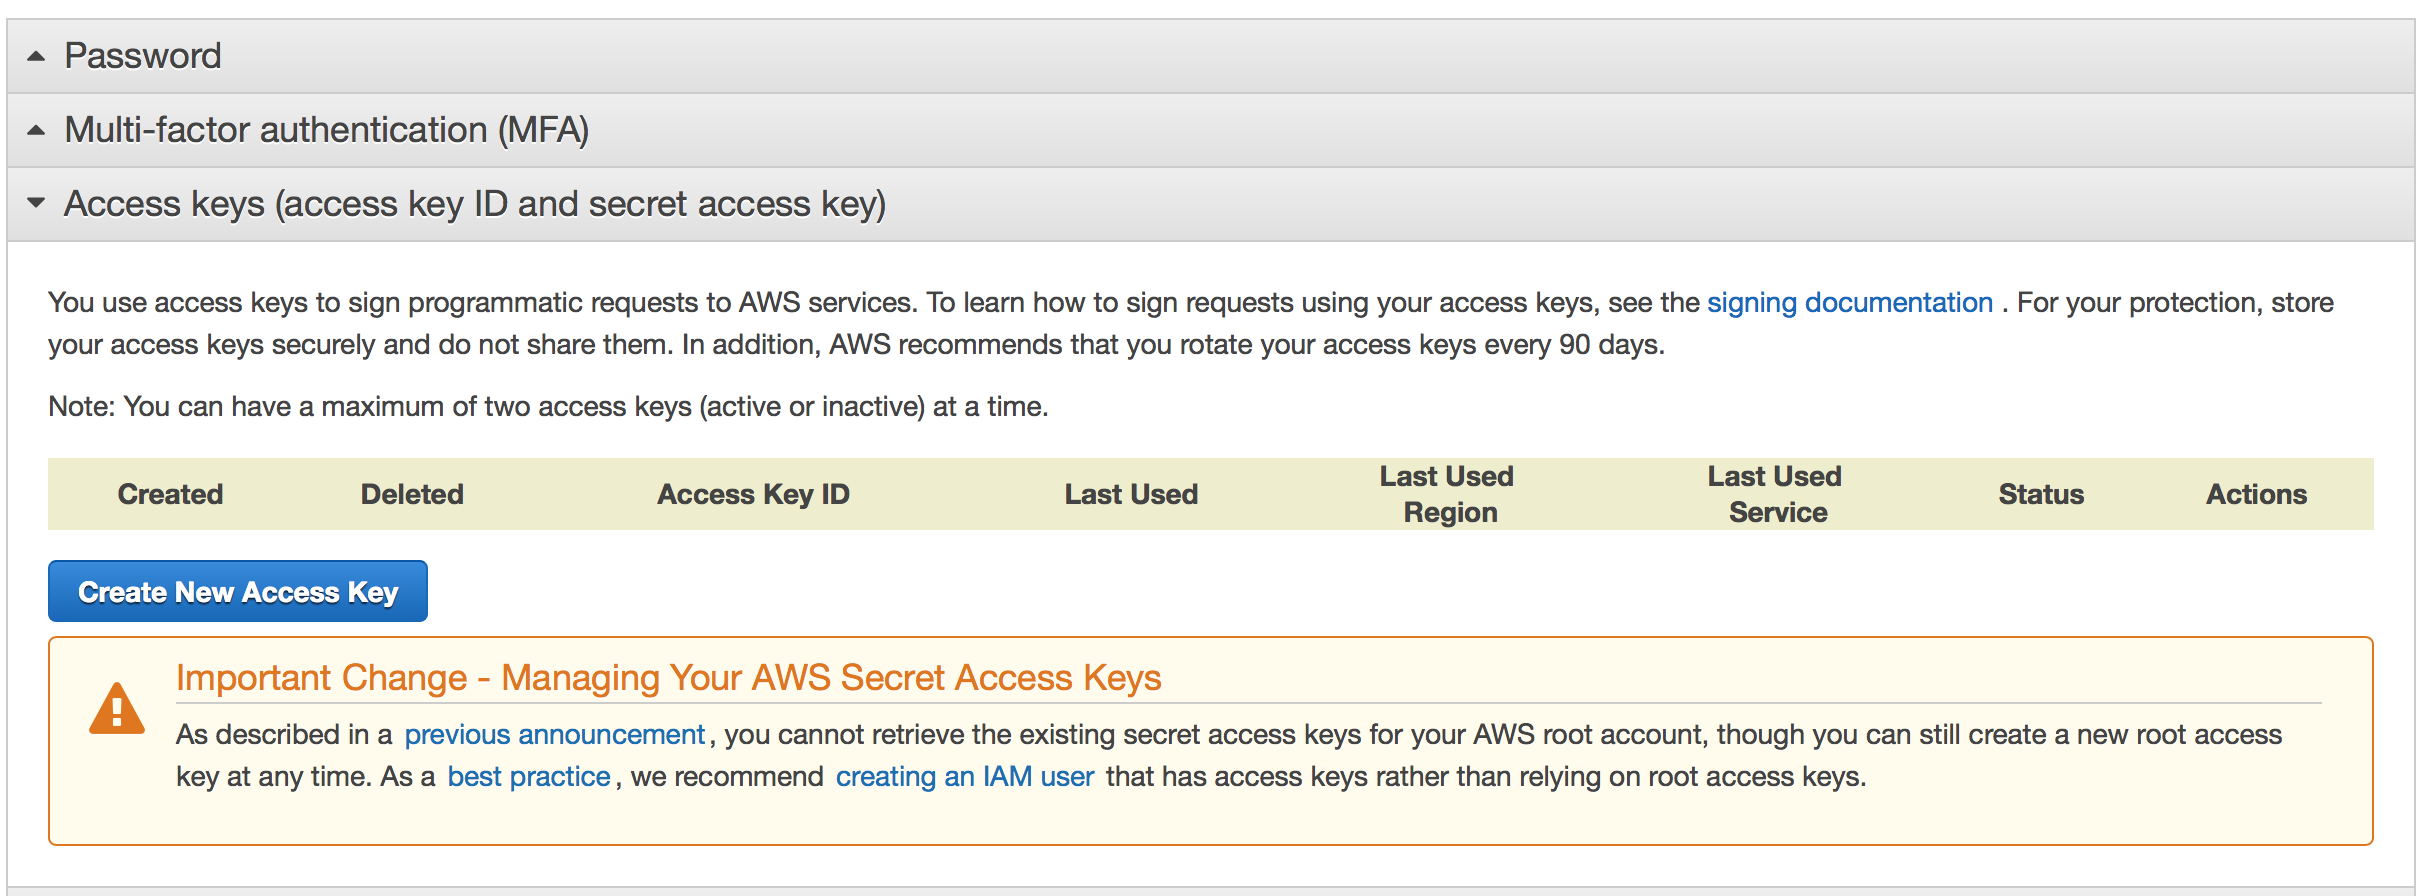
Find the ‘Access Keys’ section, and create the Access Key Or Copy the latest Access Key ID.


Click on the ‘Show Access Key’ in the same row, and copy the Secret Access Key.

Now, Type “AWS configure” in the Powershell console
PS C:\Users\Administrator> aws configure
AWS Access Key ID [None]: AKIAJP*********CQ
AWS Secret Access Key [None]: AFqTi9O**************WMnPY
Default region name [None]: ap-southeast-2
Default output format [None]: text
Find out that Machine “image-id” and respective “subnet-id.”
Copy and paste the below script on your local and change the variable’s value accordingly.
# Creation of AWS windows VMs - Ravi

 [CmdletBinding()]
    Param(
    [Parameter(Mandatory=$True,Position=1)]
    [string]$instname
    )

echo -e “Launching the Windows 2016 Server ....\n”

$instance_id=$(aws ec2 run-instances --image-id ami-f15e4992  --subnet-id subnet-b0d742c6 --count 1 --instance-type m1.large --key-name MicroFocusDemo --associate-public-ip-address --query Instances[*].InstanceId)

echo -e “AWS instance_id is $instance_id\n”

echo -e “Server is still provisioning . . . .  Please Wait....\n”

sleep 30

do { sleep 30; echo 'Still Initializing....'; $state=$(((aws ec2 describe-instance-status --instance-id $instance_id | select-string -pattern INSTANCESTATUS | select-object -Last 1 | out-string).split("`n") -match '\S').Substring(15)) } until ($state -match 'ok')

echo -e “Server is ready for your use\n”

aws ec2 create-tags --resources $instance_id --tag Key=Name,Value=$instname

echo -n “”

$ip_address=$(aws ec2 describe-instances --instance-ids $instance_id --output text --query 'Reservations[*].Instances[*].PublicIpAddress')

echo -e “================================================\n”
echo -e "AWS VM Instance id is $instance_id\n"
echo -e "VM Public IP Address is $ip_address\n"
echo -e "AWS VM name is $instname\n"
echo -e “================================================\n”


Clear-Variable -Name instance_id
Clear-Variable -Name instname
Clear-Variable -Name state
Clear-Variable -Name ip_address

echo -e “AWS VM provisioned successfully\n”
Run the PowerShell script, and you will see a New Windows AWS VM created for you.

nice trick