Are you tired of remembering your passwords for different tools when working for the same account/project?
How do you feel when you join any project that allows you to log in with your LDAP/AD Password. Or, have one portal for all the tools so that you log in once and access all the tools – does this exhilarate you?
In this SSO implementation guide, I will show you how to implement single sign-on using ReverseProxy with httpd basic user authentication and the process to use LDAP authentication (step-by-step with screenshots and code snippets).
Most enterprises have multiple tools that developers use daily. Logging into multiple tools often requires the users to remember respective URLs and sometimes separate credentials.
There are always many requests for URLs, access issues, and other service requests that require few engineers to manage these requests.
If the tool is not running behind the load balancer and a new version of the tools needs to be tested without shutting down the old one, the DevOps team shares the new URL, which sometimes confuses the end-users.
So, what’s the solution?
A Centralized, secure Application webpage for self-service of the user.
What are the advantages of having SSO?
You can manage various tools, including CI/CD, Config Management, IAAC, Testing and Project management tools with Single Sign On (SSO) and Secure Socket Layer (SSL) and its successor, TLS (Transport Layer Security).
What does this mean?
The SSO tool will provide a single place to launch and log in to various tools and applications available in the organization.
Implementing SSO with SSL/TLS on the web page so all users can use their network/Lan password to log on to the desired tools. It will also have history and logging for easy traceability.
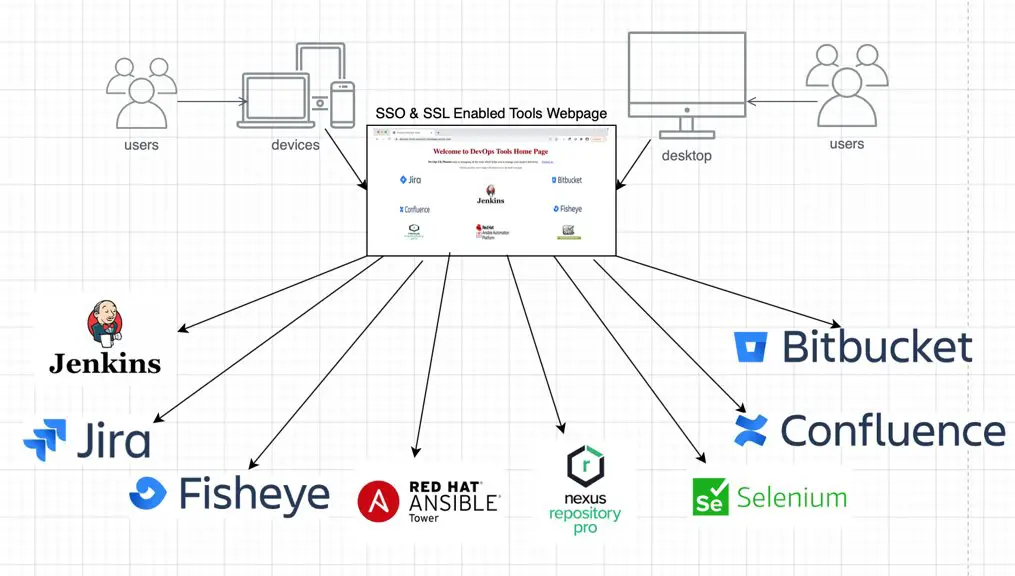
The solution is to put together a single pane of view for all the tools.
This will be the single place to:
- View all the tools available in the enterprise,
- One time Login and launch all the tools from the Tool page., saving a lot of time
- Request access
- Display messages such as open any tool being down
- Display messages for upcoming updates/upgrades
- DevOps team will be able to test new version without changing the application URL
And more unique features
- SSO implementation provides a secure login with SSO and will be integrated with the corporate AD.
- The page can also displays the health of the tools and avoids too many incident calls when any tools are down.
- Can save the key events like unplanned downtime for SLA and KPI reporting
- Helps DevOps/Tools Team to run multiple version of any of the tools.
- Easy access to all tools for all the users.
- Provide validations and restrictions for any unauthorized login. Track the login attempts.
- Reduces the churn in services request and takes away of guess work on availability of tools in the estate.
- Easy to introduce and socialize the new tools
- Save time for users and users don’t have to remembers multiple URLs for logging into tools
- Saves time by not needed to login every tool as it requires only one time login to the tools page.
What is SSO implementation?
Single Sign-On (SSO) is an authentication process that allows users to securely authenticate multiple websites or applications with a single set of login credentials (same username and password). SSO is an identity solution that allows multiple applications/tools to use the same authentication session to reduce the number of credentials required to sign in to multiple services.
What is SSL or TLS ?
Secure Sockets Layer (SSL) provides a secure channel between two machines or devices operating over the internet or an internal network. SSL/TLS provides secure web browsing via the HTTPS protocol. An HTTPS website that includes SSL/TLS certificate that a trusted Certificate Authority signs can assure Authenticity, Encryption and Data Integrity.
How Single sign-on (SSO) implementation Works?
Before I go into the detailed steps of how to implement SSO and create your own SSL-enabled web page to login to all the tools and applications with the same set of credentials, let me first quickly show you how it would all work after it’s all done so you get an idea.
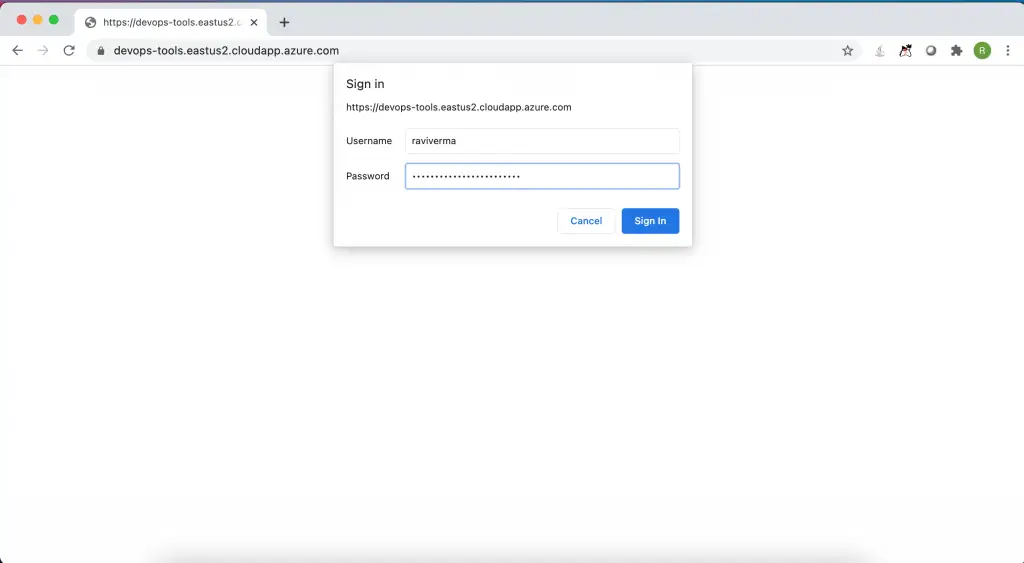
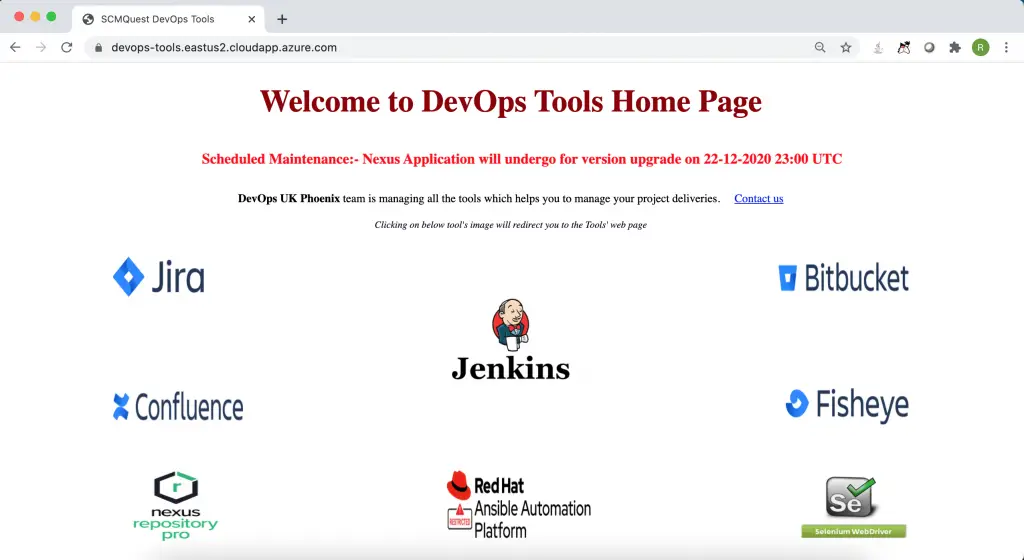
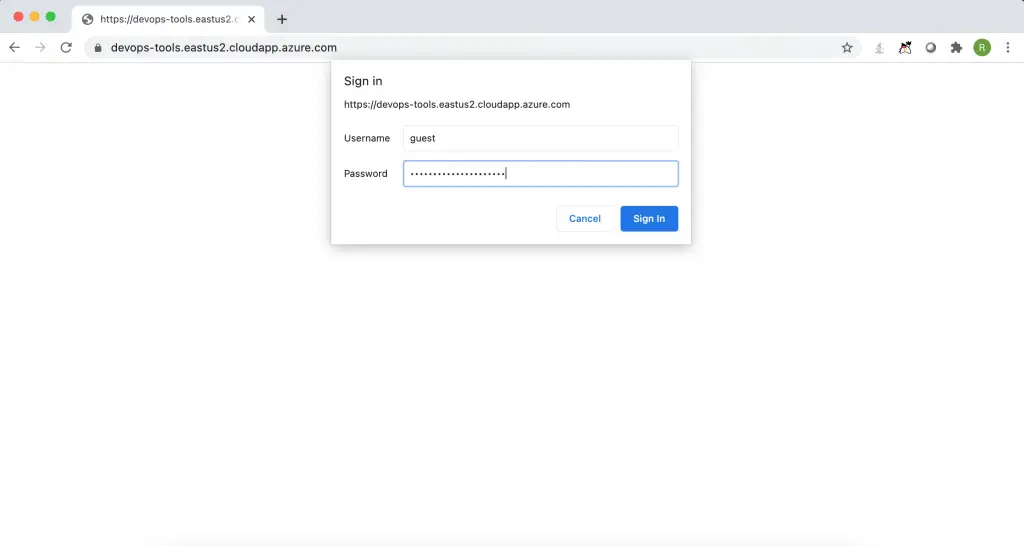
When you open the website URL, the SSO webpage prompts you to enter the credentials.
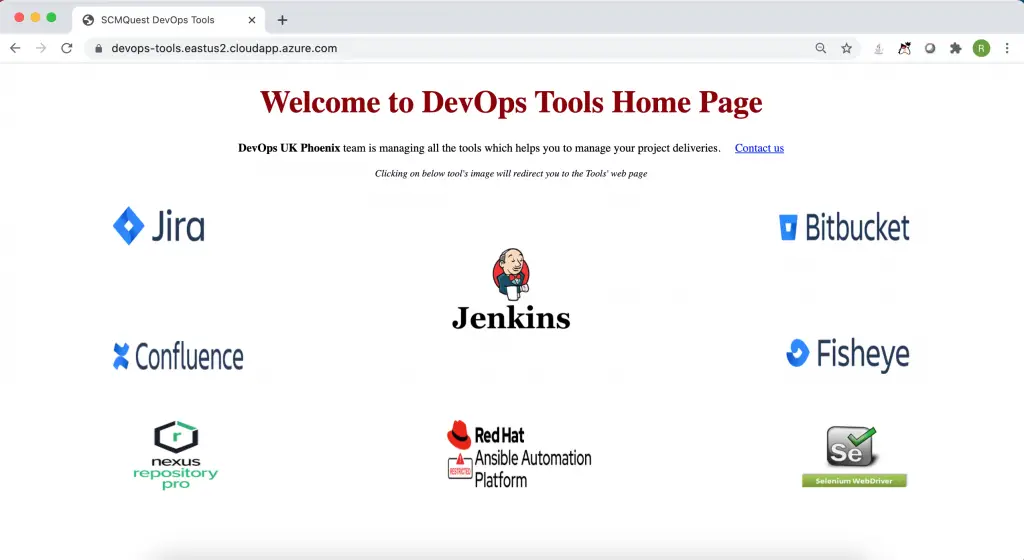
On successful login, you land on the Tool’s Home page, where you can find all the available tools icons and important messages.
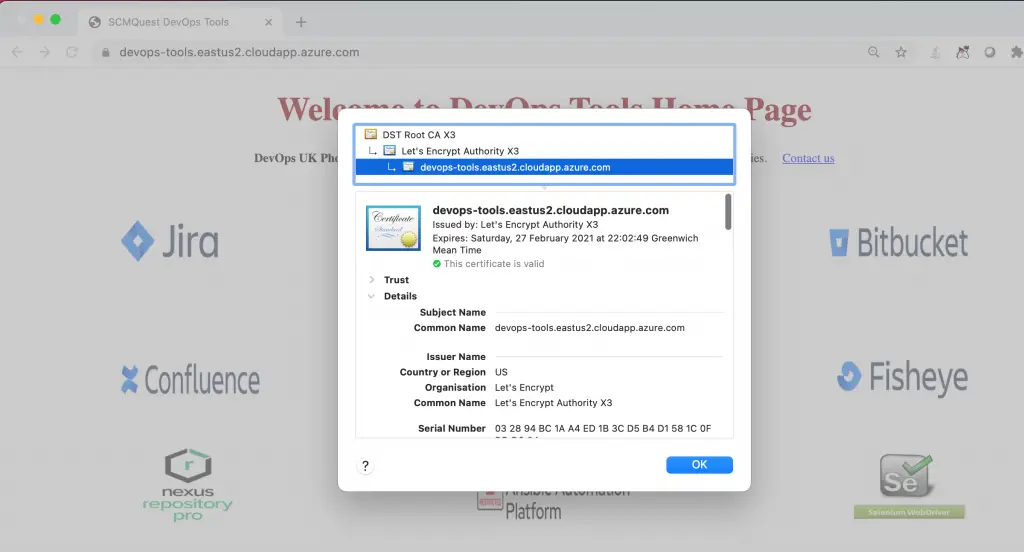
You can also verify if the SSL/TLS (HTTPS with valid certificate) is implemented correctly.
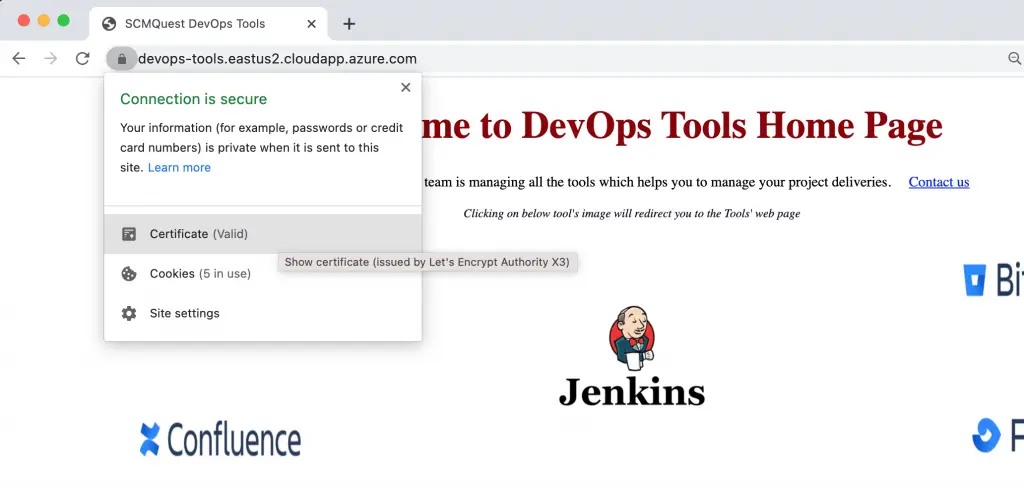
Fetch the details of the certificate.
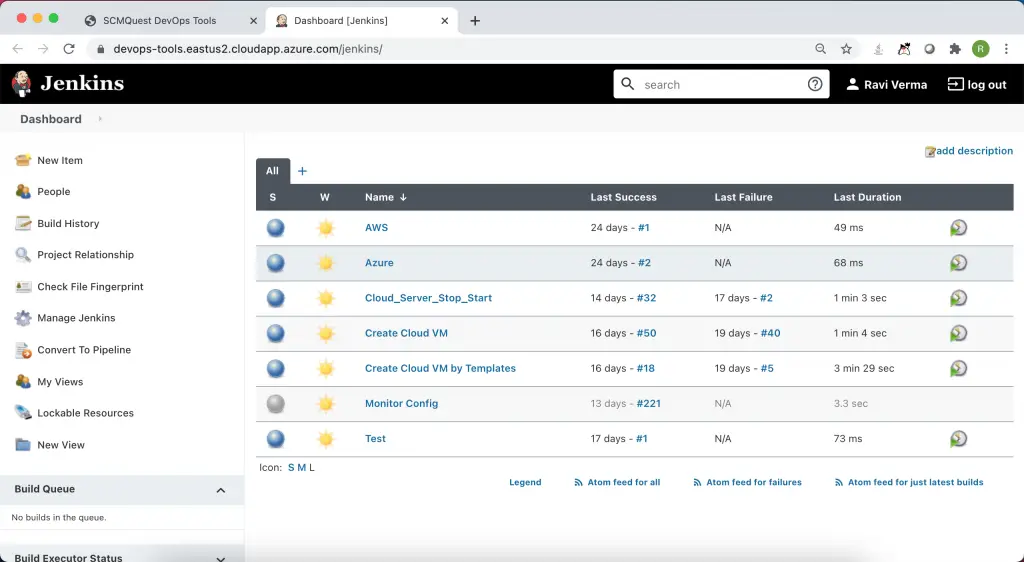
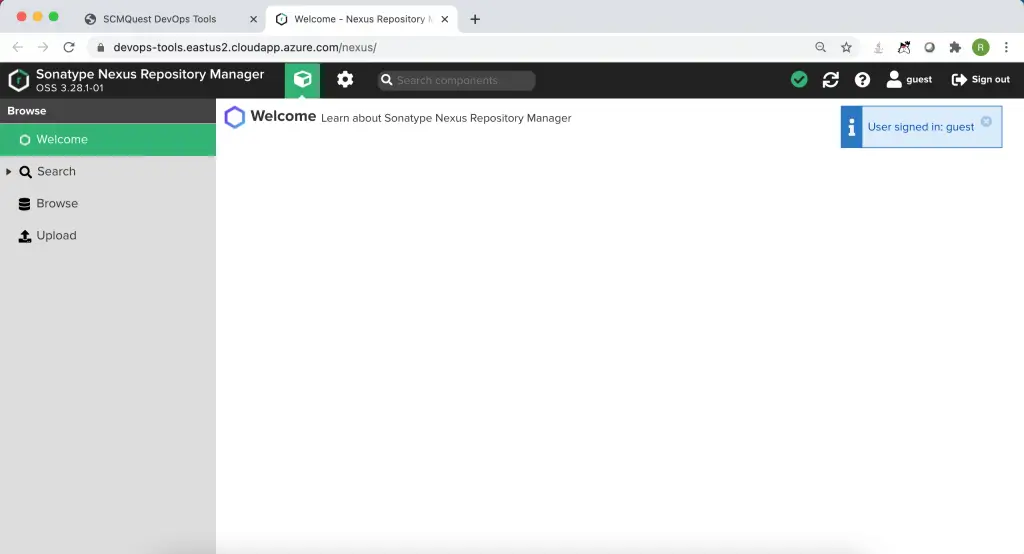
When you click on the Jenkins icon – it redirects you to Jenkins Dashboard without prompting you to log in again.
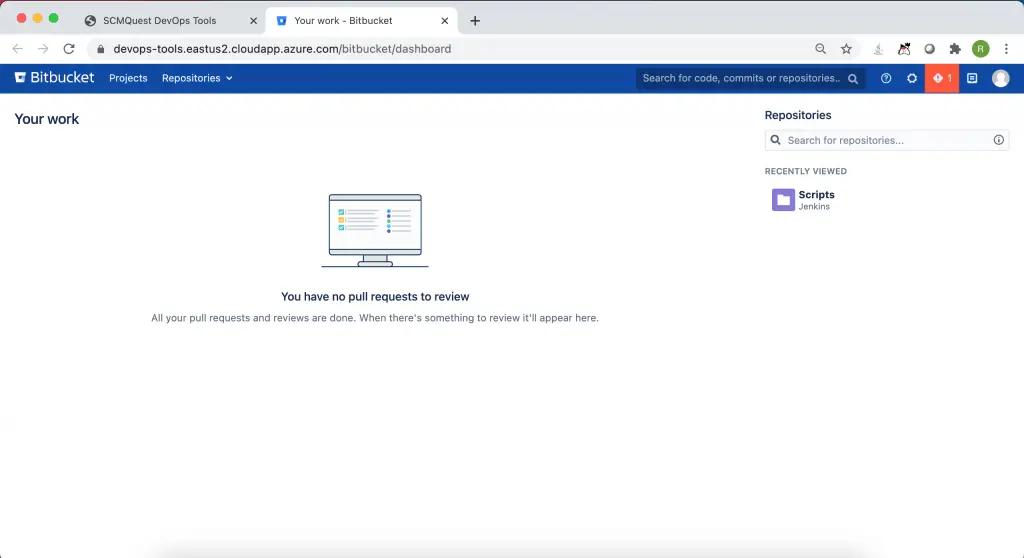
Similarly, for Bitbucket.
Jira.
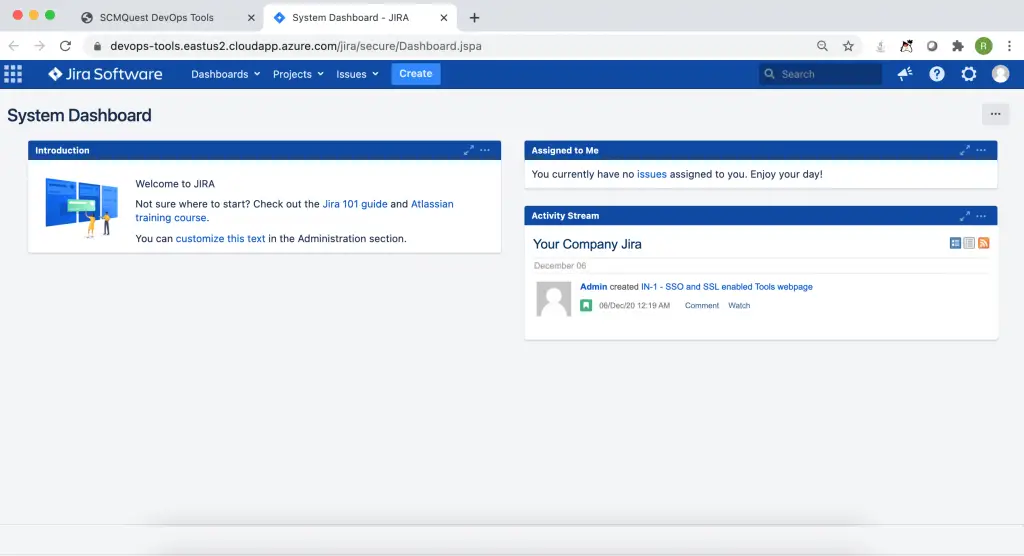
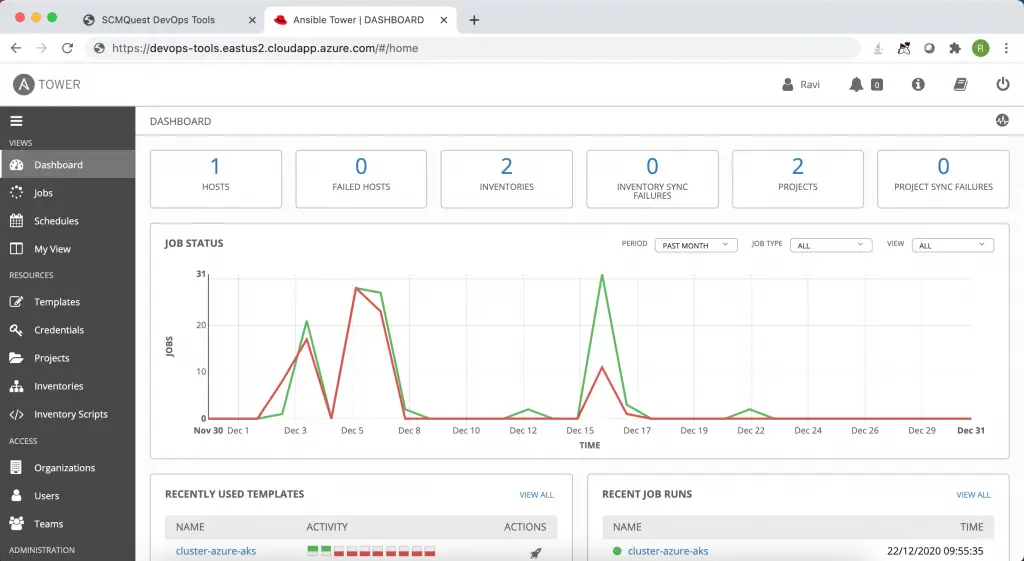
And Ansible Tower.
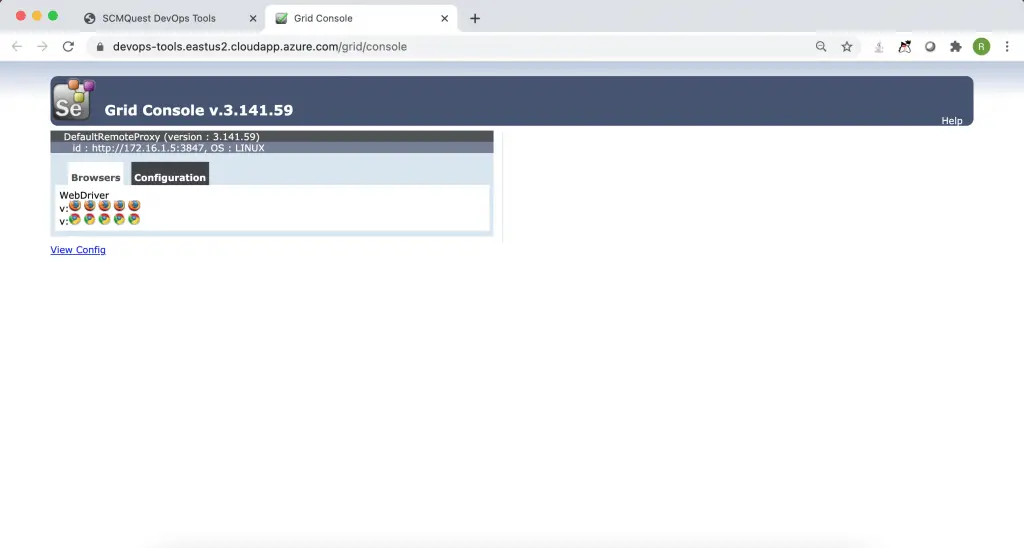
And Selenium Grid, and so on.
A real time-saver for you and the entire organization.
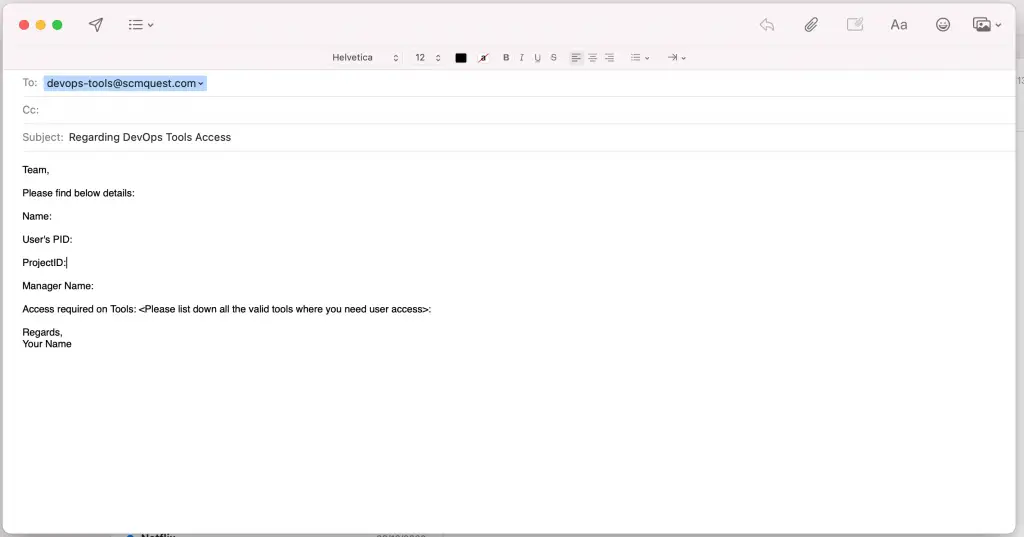
If you click on the ‘Contact Us’ link, it will open an outlook New mail with a predefined template and mailto list.
You can also display the upcoming event details, so that organisation’s users are aware of the scheduled changes.
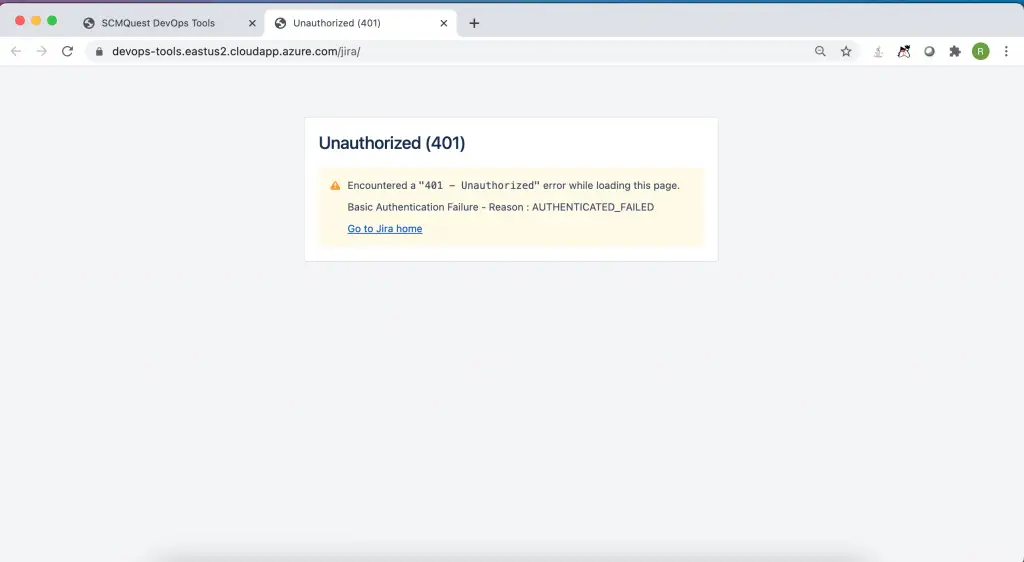
Now, you must be thinking, what if I don’t have access to all the tools?
Suppose someone just requested Nexus and Jira access, but the PM has approved Nexus access, and the tools team has only provided access to Nexus.
So, when the user logins to the same portal.
The user would be able to see the same page as everyone.

When the user clicks on Nexus, they would be able to login into Nexus automatically.
But, when the user tries to access Jira, they get an unauthorised access error. Users can then request the team to provide Jira access with proper justifications and approvals.
Now, let’s see how to configure this awesome webpage.
How to Create SSO (and SSL enabled) webpage?
#1. Create a Proxy Server
First of all, you need a Proxy server. There are multiple options/providers, such as httpd, Nginx, and HAProxy. I have used Apache httpd Reverse Proxy for this demo.
I created a server in the Azure cloud and configured the DNS for the same.
The first step is to Install the httpd either through yum, apt-get, rpm or through binary sources.
[root@DevOps-Phonix-Tools-VM ~]# cd /etc/httpd/
[root@DevOps-Phonix-Tools-VM httpd]#
[root@DevOps-Phonix-Tools-VM httpd]# ls -lrt
total 0
lrwxrwxrwx. 1 root root  19 Sep 15 15:42 state -> ../../var/lib/httpd
lrwxrwxrwx. 1 root root  10 Sep 15 15:42 run -> /run/httpd
lrwxrwxrwx. 1 root root  29 Sep 15 15:42 modules -> ../../usr/lib64/httpd/modules
lrwxrwxrwx. 1 root root  19 Sep 15 15:42 logs -> ../../var/log/httpd
drwxr-xr-x. 2 root root 245 Nov 29 02:07 conf.modules.d
drwxr-xr-x. 2 root root  83 Dec  6 00:09 conf
drwxr-xr-x. 2 root root 118 Dec 11 23:27 conf.d
#2. Configure the Reverse Proxy and SSL
Create a file where you can configure the reverse proxy. In this example, I have installed all the tools on the same machine; hence I am using 127.0.0.1 (localhost) as a source address, but you can provide the respective server’s IP as required.
[root@DevOps-Phonix-Tools-VM httpd]# cd conf.d/
[root@DevOps-Phonix-Tools-VM conf.d]# ls -lrt
total 32
-rw-r--r--. 1 root root  738 Sep 15 15:39 welcome.conf
-rw-r--r--. 1 root root 1252 Sep 15 15:39 userdir.conf
-rw-r--r--. 1 root root 2926 Sep 15 15:42 autoindex.conf
-rw-r--r--. 1 root root  400 Sep 15 15:46 README
-rw-r--r--. 1 root root 8997 Nov 30 00:24 ssl.conf
-rw-r--r--. 1 root root 2662 Dec 11 23:27 reverse.conf

[root@DevOps-Phonix-Tools-VM conf.d]# cat reverse.conf
<Proxy *>
Order deny,allow
Allow from all
</Proxy>

ProxyRequests           Off
ProxyPreserveHost       On
SSLProxyEngine          On
SSLProxyVerify none
AllowEncodedSlashes NoDecode

SSLProxyCheckPeerCN off
SSLProxyCheckPeerName off
SSLProxyCheckPeerExpire off


RewriteCond %{HTTP:UPGRADE} ^WebSocket$ [NC]
RewriteCond %{HTTP:CONNECTION} Upgrade$ [NC]


Alias /static/ /var/lib/awx/public/static/

Header always set Access-Control-Allow-Origin "*"
Header always set Access-Control-Allow-Methods "POST, GET, OPTIONS, DELETE, PUT"
RewriteCond %{REQUEST_METHOD} OPTIONS
RewriteRule ^(.*)$ $1 [R=200,L]


ProxyPass               /jenkins           http://127.0.0.1:8081/jenkins
ProxyPassReverse        /jenkins           https://127.0.0.1:8081/jenkins
ProxyPass               /bitbucket         http://127.0.0.1:7990/bitbucket
ProxyPassReverse        /bitbucket         http://127.0.0.1:7990/bitbucket
ProxyPass               /jira              http://127.0.0.1:8082/jira
ProxyPassReverse        /jira              http://127.0.0.1:8082/jira
ProxyPass               /confluence        http://127.0.0.1:8090/confluence
ProxyPassReverse        /confluence        http://127.0.0.1:8090/confluence
ProxyPass               /fisheye           http://127.0.0.1:8060/fisheye
ProxyPassReverse        /fisheye           http://127.0.0.1:8060/fisheye
ProxyPass               /nexus             http://127.0.0.1:8084/nexus
ProxyPassReverse        /nexus             http://127.0.0.1:8084/nexus
ProxyPass               /grid              http://127.0.0.1:4444/grid
ProxyPassReverse        /grid              http://127.0.0.1:4444/grid


RequestHeader set X-Forwarded-Proto "https"
RequestHeader set X-Forwarded-Port "443"

<Location />
AllowMethods GET POST PUT OPTIONS
</Location>

[root@DevOps-Phonix-Tools-VM conf.d]#
I used Letsencrypt for the authentic SSL certificates for this demo. You can use your organisation’s Certificate Authority provided certificates.
[root@DevOps-Phonix-Tools-VM]# cd /etc/letsencrypt/live/
[root@DevOps-Phonix-Tools-VM live]# ls -lrt
total 4
-rw-r--r--. 1 root root 740 Nov 29 23:02 README
drwxr-xr-x. 2 root root  93 Nov 29 23:02 devops-tools.eastus2.cloudapp.azure.com
[root@DevOps-Phonix-Tools-VM live]# cd devops-tools.eastus2.cloudapp.azure.com/
[root@DevOps-Phonix-Tools-VM devops-tools.eastus2.cloudapp.azure.com]# ls
cert.pem  chain.pem  fullchain.pem  privkey.pem  README
[root@DevOps-Phonix-Tools-VM devops-tools.eastus2.cloudapp.azure.com]#
[root@DevOps-Phonix-Tools-VM devops-tools.eastus2.cloudapp.azure.com]#
Create/Modify ssl.conf as required. We’ve configured 443 port and SSL certificates through ssl.conf file.
[root@DevOps-Phonix-Tools-VM conf.d]# cat ssl.conf
#
# When we also provide SSL we have to listen to the
# standard HTTPS port in addition.
#
Listen 443 https

##
##  SSL Global Context
##
##  All SSL configuration in this context applies both to
##  the main server and all SSL-enabled virtual hosts.
##

#   Pass Phrase Dialog:
#   Configure the pass phrase gathering process.
#   The filtering dialog program (`builtin' is a internal
#   terminal dialog) has to provide the pass phrase on stdout.
SSLPassPhraseDialog exec:/usr/libexec/httpd-ssl-pass-dialog

#   Inter-Process Session Cache:
#   Configure the SSL Session Cache: First the mechanism
#   to use and second the expiring timeout (in seconds).
SSLSessionCache         shmcb:/run/httpd/sslcache(512000)
SSLSessionCacheTimeout  300

#
# Use "SSLCryptoDevice" to enable any supported hardware
# accelerators. Use "openssl engine -v" to list supported
# engine names.  NOTE: If you enable an accelerator and the
# server does not start, consult the error logs and ensure
# your accelerator is functioning properly.
#
SSLCryptoDevice builtin
#SSLCryptoDevice ubsec

##
## SSL Virtual Host Context
##

<VirtualHost _default_:443>

# General setup for the virtual host, inherited from global configuration
DocumentRoot "/var/www/html"


#ServerName www.example.com:443
# Use separate log files for the SSL virtual host; note that LogLevel
# is not inherited from httpd.conf.
ErrorLog logs/ssl_error_log
TransferLog logs/ssl_access_log
LogLevel warn

#   SSL Engine Switch:
#   Enable/Disable SSL for this virtual host.
SSLEngine on

#   List the protocol versions which clients are allowed to connect with.
#   The OpenSSL system profile is used by default.  See
#   update-crypto-policies(8) for more details.
#SSLProtocol all -SSLv3
#SSLProxyProtocol all -SSLv3

#   User agents such as web browsers are not configured for the user's
#   own preference of either security or performance, therefore this
#   must be the prerogative of the web server administrator who manages
#   cpu load versus confidentiality, so enforce the server's cipher order.
SSLHonorCipherOrder on

#   SSL Cipher Suite:
#   List the ciphers that the client is permitted to negotiate.
#   See the mod_ssl documentation for a complete list.
#   The OpenSSL system profile is configured by default.  See
#   update-crypto-policies(8) for more details.
SSLCipherSuite PROFILE=SYSTEM
SSLProxyCipherSuite PROFILE=SYSTEM

#   Point SSLCertificateFile at a PEM encoded certificate.  If
#   the certificate is encrypted, then you will be prompted for a
#   pass phrase.  Note that restarting httpd will prompt again.  Keep
#   in mind that if you have both an RSA and a DSA certificate you
#   can configure both in parallel (to also allow the use of DSA
#   ciphers, etc.)
#   Some ECC cipher suites (http://www.ietf.org/rfc/rfc4492.txt)
#   require an ECC certificate which can also be configured in
#   parallel.

# Lets encrypt certificate files
SSLCertificateFile /etc/letsencrypt/live/devops-tools.eastus2.cloudapp.azure.com/fullchain.pem
SSLCertificateKeyFile /etc/letsencrypt/live/devops-tools.eastus2.cloudapp.azure.com/privkey.pem
Include /etc/letsencrypt/options-ssl-apache.conf

#SSLCertificateFile /etc/pki/tls/certs/localhost.crt

#   Server Private Key:
#   If the key is not combined with the certificate, use this
#   directive to point at the key file.  Keep in mind that if
#   you've both a RSA and a DSA private key you can configure
#   both in parallel (to also allow the use of DSA ciphers, etc.)
#   ECC keys, when in use, can also be configured in parallel
#SSLCertificateKeyFile /etc/pki/tls/private/localhost.key

#   Server Certificate Chain:
#   Point SSLCertificateChainFile at a file containing the
#   concatenation of PEM encoded CA certificates which form the
#   certificate chain for the server certificate. Alternatively
#   the referenced file can be the same as SSLCertificateFile
#   when the CA certificates are directly appended to the server
#   certificate for convenience.
#SSLCertificateChainFile /etc/pki/tls/certs/server-chain.crt

#   Certificate Authority (CA):
#   Set the CA certificate verification path where to find CA
#   certificates for client authentication or alternatively one
#   huge file containing all of them (file must be PEM encoded)
#SSLCACertificateFile /etc/pki/tls/certs/ca-bundle.crt

#   Client Authentication (Type):
#   Client certificate verification type and depth.  Types are
#   none, optional, require and optional_no_ca.  Depth is a
#   number which specifies how deeply to verify the certificate
#   issuer chain before deciding the certificate is not valid.
#SSLVerifyClient require
#SSLVerifyDepth  10

#   Access Control:
#   With SSLRequire you can do per-directory access control based
#   on arbitrary complex boolean expressions containing server
#   variable checks and other lookup directives.  The syntax is a
#   mixture between C and Perl.  See the mod_ssl documentation
#   for more details.
#<Location />
#SSLRequire (    %{SSL_CIPHER} !~ m/^(EXP|NULL)/ \
#            and %{SSL_CLIENT_S_DN_O} eq "Snake Oil, Ltd." \
#            and %{SSL_CLIENT_S_DN_OU} in {"Staff", "CA", "Dev"} \
#            and %{TIME_WDAY} >= 1 and %{TIME_WDAY} <= 5 \
#            and %{TIME_HOUR} >= 8 and %{TIME_HOUR} <= 20       ) \
#           or %{REMOTE_ADDR} =~ m/^192\.76\.162\.[0-9]+$/
#</Location>

#   SSL Engine Options:
#   Set various options for the SSL engine.
#   o FakeBasicAuth:
#     Translate the client X.509 into a Basic Authorisation.  This means that
#     the standard Auth/DBMAuth methods can be used for access control.  The
#     user name is the `one line' version of the client's X.509 certificate.
#     Note that no password is obtained from the user. Every entry in the user
#     file needs this password: `xxj31ZMTZzkVA'.
#   o ExportCertData:
#     This exports two additional environment variables: SSL_CLIENT_CERT and
#     SSL_SERVER_CERT. These contain the PEM-encoded certificates of the
#     server (always existing) and the client (only existing when client
#     authentication is used). This can be used to import the certificates
#     into CGI scripts.
#   o StdEnvVars:
#     This exports the standard SSL/TLS related `SSL_*' environment variables.
#     Per default this exportation is switched off for performance reasons,
#     because the extraction step is an expensive operation and is usually
#     useless for serving static content. So one usually enables the
#     exportation for CGI and SSI requests only.
#   o StrictRequire:
#     This denies access when "SSLRequireSSL" or "SSLRequire" applied even
#     under a "Satisfy any" situation, i.e. when it applies access is denied
#     and no other module can change it.
#   o OptRenegotiate:
#     This enables optimized SSL connection renegotiation handling when SSL
#     directives are used in per-directory context.
#SSLOptions +FakeBasicAuth +ExportCertData +StrictRequire
<FilesMatch "\.(cgi|shtml|phtml|php)$">
    SSLOptions +StdEnvVars
</FilesMatch>
<Directory "/var/www/cgi-bin">
    SSLOptions +StdEnvVars
</Directory>

#   SSL Protocol Adjustments:
#   The safe and default but still SSL/TLS standard compliant shutdown
#   approach is that mod_ssl sends the close notify alert but doesn't wait for
#   the close notify alert from client. When you need a different shutdown
#   approach you can use one of the following variables:
#   o ssl-unclean-shutdown:
#     This forces an unclean shutdown when the connection is closed, i.e. no
#     SSL close notify alert is sent or allowed to be received.  This violates
#     the SSL/TLS standard but is needed for some brain-dead browsers. Use
#     this when you receive I/O errors because of the standard approach where
#     mod_ssl sends the close notify alert.
#   o ssl-accurate-shutdown:
#     This forces an accurate shutdown when the connection is closed, i.e. a
#     SSL close notify alert is sent and mod_ssl waits for the close notify
#     alert of the client. This is 100% SSL/TLS standard compliant, but in
#     practice often causes hanging connections with brain-dead browsers. Use
#     this only for browsers where you know that their SSL implementation
#     works correctly.
#   Notice: Most problems of broken clients are also related to the HTTP
#   keep-alive facility, so you usually additionally want to disable
#   keep-alive for those clients, too. Use variable "nokeepalive" for this.
#   Similarly, one has to force some clients to use HTTP/1.0 to workaround
#   their broken HTTP/1.1 implementation. Use variables "downgrade-1.0" and
#   "force-response-1.0" for this.
BrowserMatch "MSIE [2-5]" \
         nokeepalive ssl-unclean-shutdown \
         downgrade-1.0 force-response-1.0

#   Per-Server Logging:
#   The home of a custom SSL log file. Use this when you want a
#   compact non-error SSL logfile on a virtual host basis.
CustomLog logs/ssl_request_log \
          "%t %h %{SSL_PROTOCOL}x %{SSL_CIPHER}x \"%r\" %b"

</VirtualHost>

[root@DevOps-Phonix-Tools-VM conf.d]#
Now, modify the httpd.conf – this is the main configuration file for httpd, where you define all the configuration details.
[root@DevOps-Phonix-Tools-VM httpd]# cd conf
[root@DevOps-Phonix-Tools-VM conf]# ls -lrt
total 48
-rw-r--r--. 1 root root 13064 Sep 15 15:41 magic
-rw-r--r--. 1 root root   439 Nov 29 23:02 httpd-le-ssl.conf
-rw-r--r--. 1 root root 12472 Dec  6 00:09 httpd.conf
[root@DevOps-Phonix-Tools-VM conf]# cat httpd.conf
#
# This is the main Apache HTTP server configuration file.  It contains the
# configuration directives that give the server its instructions.
# See <URL:http://httpd.apache.org/docs/2.4/> for detailed information.
# In particular, see
# <URL:http://httpd.apache.org/docs/2.4/mod/directives.html>
# for a discussion of each configuration directive.
#
# See the httpd.conf(5) man page for more information on this configuration,
# and httpd.service(8) on using and configuring the httpd service.
#
# Do NOT simply read the instructions in here without understanding
# what they do.  They're here only as hints or reminders.  If you are unsure
# consult the online docs. You have been warned.
#
# Configuration and logfile names: If the filenames you specify for many
# of the server's control files begin with "/" (or "drive:/" for Win32), the
# server will use that explicit path.  If the filenames do *not* begin
# with "/", the value of ServerRoot is prepended -- so 'log/access_log'
# with ServerRoot set to '/www' will be interpreted by the
# server as '/www/log/access_log', where as '/log/access_log' will be
# interpreted as '/log/access_log'.

#
# ServerRoot: The top of the directory tree under which the server's
# configuration, error, and log files are kept.
#
# Do not add a slash at the end of the directory path.  If you point
# ServerRoot at a non-local disk, be sure to specify a local disk on the
# Mutex directive, if file-based mutexes are used.  If you wish to share the
# same ServerRoot for multiple httpd daemons, you will need to change at
# least PidFile.
#
ServerRoot "/etc/httpd"

#
# Listen: Allows you to bind Apache to specific IP addresses and/or
# ports, instead of the default. See also the <VirtualHost>
# directive.
#
# Change this to Listen on specific IP addresses as shown below to
# prevent Apache from glomming onto all bound IP addresses.
#
#Listen 12.34.56.78:80
Listen 80

<VirtualHost *:80>
    ServerName devops-tools.eastus2.cloudapp.azure.com
    DocumentRoot /var/www/html
    ErrorLog /var/log/httpd/error_http.log
    RewriteEngine on
    RewriteCond %{SERVER_NAME} =devops-tools.eastus2.cloudapp.azure.com
    RewriteRule ^ https://%{SERVER_NAME}%{REQUEST_URI} [END,NE,R=permanent]
    RequestHeader set X-Forwarded-Port "443"
    RequestHeader set X-Forwarded-Proto "https"
</VirtualHost>

#
# Dynamic Shared Object (DSO) Support
#
# To be able to use the functionality of a module which was built as a DSO you
# have to place corresponding `LoadModule' lines at this location so the
# directives contained in it are actually available _before_ they are used.
# Statically compiled modules (those listed by `httpd -l') do not need
# to be loaded here.
#
# Example:
# LoadModule foo_module modules/mod_foo.so
#
Include conf.modules.d/*.conf

#
# If you wish httpd to run as a different user or group, you must run
# httpd as root initially and it will switch.
#
# User/Group: The name (or #number) of the user/group to run httpd as.
# It is usually good practice to create a dedicated user and group for
# running httpd, as with most system services.
#
User apache
Group apache

# 'Main' server configuration
#
# The directives in this section set up the values used by the 'main'
# server, which responds to any requests that aren't handled by a
# <VirtualHost> definition.  These values also provide defaults for
# any <VirtualHost> containers you may define later in the file.
#
# All of these directives may appear inside <VirtualHost> containers,
# in which case these default settings will be overridden for the
# virtual host being defined.
#

#
# ServerAdmin: Your address, where problems with the server should be
# e-mailed.  This address appears on some server-generated pages, such
# as error documents.  e.g. [email protected]
#
ServerAdmin root@localhost

#
# ServerName gives the name and port that the server uses to identify itself.
# This can often be determined automatically, but we recommend you specify
# it explicitly to prevent problems during startup.
#
# If your host doesn't have a registered DNS name, enter its IP address here.
#

#ServerName devops-tools.eastus2.cloudapp.azure.com
ServerName 127.0.0.1

#
# Deny access to the entirety of your server's filesystem. You must
# explicitly permit access to web content directories in other
# <Directory> blocks below.
#
<Directory />
    AllowOverride none
    Require all denied
</Directory>

#
# Note that from this point forward you must specifically allow
# particular features to be enabled - so if something's not working as
# you might expect, make sure that you have specifically enabled it
# below.
#

#
# DocumentRoot: The directory out of which you will serve your
# documents. By default, all requests are taken from this directory, but
# symbolic links and aliases may be used to point to other locations.
#
DocumentRoot "/var/www/html"

#
# Relax access to content within /var/www.
#
<Directory "/var/www">
    AllowOverride None
    # Allow open access:
    Require all granted

</Directory>

# Further relax access to the default document root:
<Directory "/var/www/html">
    #
    # Possible values for the Options directive are "None", "All",
    # or any combination of:
    #   Indexes Includes FollowSymLinks SymLinksifOwnerMatch ExecCGI MultiViews
    #
    # Note that "MultiViews" must be named *explicitly* --- "Options All"
    # doesn't give it to you.
    #
    # The Options directive is both complicated and important.  Please see
    # http://httpd.apache.org/docs/2.4/mod/core.html#options
    # for more information.
    #
    Options Indexes FollowSymLinks
#    Options Indexes Includes FollowSymLinks MultiViews
    #
    # AllowOverride controls what directives may be placed in .htaccess files.
    # It can be "All", "None", or any combination of the keywords:
    #   Options FileInfo AuthConfig Limit
    #
    AllowOverride AuthConfig

    #
    # Controls who can get stuff from this server.
    #
    Require all granted
</Directory>

#
# DirectoryIndex: sets the file that Apache will serve if a directory
# is requested.
#
<IfModule dir_module>
    DirectoryIndex index.html
</IfModule>

#
# The following lines prevent .htaccess and .htpasswd files from being
# viewed by Web clients.
#
<Files ".ht*">
    Require all denied
</Files>

#
# ErrorLog: The location of the error log file.
# If you do not specify an ErrorLog directive within a <VirtualHost>
# container, error messages relating to that virtual host will be
# logged here.  If you *do* define an error logfile for a <VirtualHost>
# container, that host's errors will be logged there and not here.
#
ErrorLog "logs/error_log"

#
# LogLevel: Control the number of messages logged to the error_log.
# Possible values include: debug, info, notice, warn, error, crit,
# alert, emerg.
#
LogLevel warn

<IfModule log_config_module>
    #
    # The following directives define some format nicknames for use with
    # a CustomLog directive (see below).
    #
    LogFormat "%h %l %u %t \"%r\" %>s %b \"%{Referer}i\" \"%{User-Agent}i\"" combined
    LogFormat "%h %l %u %t \"%r\" %>s %b" common

    <IfModule logio_module>
      # You need to enable mod_logio.c to use %I and %O
      LogFormat "%h %l %u %t \"%r\" %>s %b \"%{Referer}i\" \"%{User-Agent}i\" %I %O" combinedio
    </IfModule>

    #
    # The location and format of the access logfile (Common Logfile Format).
    # If you do not define any access logfiles within a <VirtualHost>
    # container, they will be logged here.  Contrariwise, if you *do*
    # define per-<VirtualHost> access logfiles, transactions will be
    # logged therein and *not* in this file.
    #
    #CustomLog "logs/access_log" common

    #
    # If you prefer a logfile with access, agent, and referer information
    # (Combined Logfile Format) you can use the following directive.
    #
    CustomLog "logs/access_log" combined
</IfModule>

<IfModule alias_module>
    #
    # Redirect: Allows you to tell clients about documents that used to
    # exist in your server's namespace, but do not anymore. The client
    # will make a new request for the document at its new location.
    # Example:
    # Redirect permanent /foo http://www.example.com/bar

    #
    # Alias: Maps web paths into filesystem paths and is used to
    # access content that does not live under the DocumentRoot.
    # Example:
    # Alias /webpath /full/filesystem/path
    #
    # If you include a trailing / on /webpath then the server will
    # require it to be present in the URL.  You will also likely
    # need to provide a <Directory> section to allow access to
    # the filesystem path.

    #
    # ScriptAlias: This controls which directories contain server scripts.
    # ScriptAliases are essentially the same as Aliases, except that
    # documents in the target directory are treated as applications and
    # run by the server when requested rather than as documents sent to the
    # client.  The same rules about trailing "/" apply to ScriptAlias
    # directives as to Alias.
    #
    ScriptAlias /cgi-bin/ "/var/www/cgi-bin/"

</IfModule>

#
# "/var/www/cgi-bin" should be changed to whatever your ScriptAliased
# CGI directory exists, if you have that configured.
#
<Directory "/var/www/cgi-bin">
    AllowOverride None
    Options None
    Require all granted
</Directory>

<IfModule mime_module>
    #
    # TypesConfig points to the file containing the list of mappings from
    # filename extension to MIME-type.
    #
    TypesConfig /etc/mime.types

    #
    # AddType allows you to add to or override the MIME configuration
    # file specified in TypesConfig for specific file types.
    #
    #AddType application/x-gzip .tgz
    #
    # AddEncoding allows you to have certain browsers uncompress
    # information on the fly. Note: Not all browsers support this.
    #
    #AddEncoding x-compress .Z
    #AddEncoding x-gzip .gz .tgz
    #
    # If the AddEncoding directives above are commented-out, then you
    # probably should define those extensions to indicate media types:
    #
    AddType application/x-compress .Z
    AddType application/x-gzip .gz .tgz

    #
    # AddHandler allows you to map certain file extensions to "handlers":
    # actions unrelated to filetype. These can be either built into the server
    # or added with the Action directive (see below)
    #
    # To use CGI scripts outside of ScriptAliased directories:
    # (You will also need to add "ExecCGI" to the "Options" directive.)
    #
    #AddHandler cgi-script .cgi

    # For type maps (negotiated resources):
    #AddHandler type-map var

    #
    # Filters allow you to process content before it is sent to the client.
    #
    # To parse .shtml files for server-side includes (SSI):
    # (You will also need to add "Includes" to the "Options" directive.)
    #
    AddType text/html .shtml
    AddOutputFilter INCLUDES .shtml
</IfModule>

#
# Specify a default charset for all content served; this enables
# interpretation of all content as UTF-8 by default.  To use the
# default browser choice (ISO-8859-1), or to allow the META tags
# in HTML content to override this choice, comment out this
# directive:
#
AddDefaultCharset UTF-8

<IfModule mime_magic_module>
    #
    # The mod_mime_magic module allows the server to use various hints from the
    # contents of the file itself to determine its type.  The MIMEMagicFile
    # directive tells the module where the hint definitions are located.
    #
    MIMEMagicFile conf/magic
</IfModule>

#
# Customizable error responses come in three flavors:
# 1) plain text 2) local redirects 3) external redirects
#
# Some examples:
#ErrorDocument 500 "The server made a boo boo."
#ErrorDocument 404 /missing.html
#ErrorDocument 404 "/cgi-bin/missing_handler.pl"
#ErrorDocument 402 http://www.example.com/subscription_info.html
#

#
# EnableMMAP and EnableSendfile: On systems that support it,
# memory-mapping or the sendfile syscall may be used to deliver
# files.  This usually improves server performance, but must
# be turned off when serving from networked-mounted
# filesystems or if support for these functions is otherwise
# broken on your system.
# Defaults if commented: EnableMMAP On, EnableSendfile Off
#
#EnableMMAP off
EnableSendfile on

# Supplemental configuration
#
# Load config files in the "/etc/httpd/conf.d" directory, if any.
IncludeOptional conf.d/*.conf
Include /etc/httpd/conf/httpd-le-ssl.conf
[root@DevOps-Phonix-Tools-VM conf]#
#3. Configure User Access and Validation
This SSO tutorial was built to provide access to inbuilt users, that were created through htpasswd.
But, in case you need to provide access to LDAP/Active Directory (AD) users, then configure the LDAP properties in httpd.conf as required; this provides you single sign-on with LDAP authentication.
For example:
# Controls who can get stuff from this server.

    Order allow,deny
    Allow from all


# LDAP configuration
  SSLRequireSSL

  AuthType Basic
  AuthName "DevOps Tools Access"
  AuthBasicProvider ldap
  AuthLDAPURL "ldap://<ldap-server-IP>:389/DC=**,DC=***********,DC=com?sAMAccountName?sub" NONE
  AuthLDAPBindDN "********@devopsbuzz.com/"

  AuthLDAPBindPassword "***************"
# AuthBasicAuthoritative  off
  AuthzLDAPAuthoritative off
  require valid-user
Create the htaccess hidden file, which validates the user access. In this demo, I had configured few users using htpasswd.
[root@DevOps-Phonix-Tools-VM html]# cat .htaccess
AuthType Basic
AuthName "Restricted Server : Please provide your credentials"
AuthBasicProvider file
AuthUserFile /etc/httpd/.htpasswd
Require valid-user
[root@DevOps-Phonix-Tools-VM html]#
We are now done with the reverse proxy and SSL configuration.
Now, let’s create the actual webpage.
#4. Create SSL-enabled Single sign-on webpage
Copy all the tools icons (jpeg/png) into the HTML directory and create the index.html page.
[root@DevOps-Phonix-Tools-VM ~]# cd /var/www/html/
[root@DevOps-Phonix-Tools-VM html]# ls -lrt
total 300
-rwxrwxrwx. 1 apache apache 85924 Nov 29 23:20 jquery.min.js
-rwxrwxrwx. 1 apache apache 4499 Nov 30 16:04 nexus.png
-rwxrwxrwx. 1 apache apache 3883 Nov 30 16:04 sonar.png
-rwxrwxrwx. 1 apache apache 11317 Nov 30 16:04 fisheye.png
-rwxrwxrwx. 1 apache apache 14786 Nov 30 16:04 confluence.png
-rwxrwxrwx. 1 apache apache 20579 Nov 30 16:04 jira.png
-rw-rw-r--. 1 apache apache 10675 Nov 30 16:48 bitbucket.png
-rw-rw-r--. 1 apache apache 55038 Nov 30 16:48 selenium.png
-rw-rw-r--. 1 apache apache 53861 Nov 30 16:48 jenkins.png
-rwxrwxrwx. 1 apache apache 17775 Dec 1 14:43 ansible.png
-rwxrwxrwx. 1 apache apache 3983 Dec 17 13:51 index.html
[root@DevOps-Phonix-Tools-VM html]#
[root@DevOps-Phonix-Tools-VM html]# cat index.html
<!DOCTYPE html>
<!-- Tools home page which allows to access all the DevOps tools created by Ravi -->
<html>
<head>
<title>SCMQuest DevOps Tools</title>
</head>
<body>
<input type="hidden" id="refreshed" value="no">
<script type="text/javascript">
onload=function(){
var e=document.getElementById("refreshed");
if(e.value=="no")e.value="yes";
else{e.value="no";location.reload();}
}
</script>
<script src="jquery.min.js"></script>
<script type="text/javascript">
$(document).ready(function () {
$(document).on("contextmenu", function (e) {
debugger;
if (e.target.nodeName != "IMG")
e.preventDefault();
});
});
</script>
<h1 style="color:DarkRed;font-family:lucida calligraphy; font-size:43px"><center> Welcome to DevOps Tools Home Page</center></h1>
<!--Uncomment to put any maintainence message
<marquee direction = "left"><h1 style="color:Red;font-family:lucida calligraphy; font-size:20px">Scheduled Maintenance:- Nexus Application will undergo for version upgrade on 22-12-2020 23:00 UTC </h1></marquee>
-->
<center><p title="For access or Tools related issue - Contact DevOps Tools Team" style="color:DarkSlateRed; font-size:16px"><b>DevOps Team</b> team is managing all the tools which helps you to manage your project deliveries. <a href="mailto:[email protected]/?subject=Regarding DevOps Tools Access&body=Team,%0D%0A%0D%0APlease%20find%20below%20details%3A%0D%0A%0D%0AName%3A%0D%0A%0D%0AUser's%20PID%3A%0D%0A%0D%0AProjectID%3A%0D%0A%0D%0AManager%20Name%3A%0D%0A%0D%0AAccess required on Tools:%20<Please%20list%20down%20all%20the%20valid%20tools%20where%20you%20need%20user%20access>%3A%0D%0A%0D%0ARegards%2C%0D%0AYour%20Name">Contact us</a></p></center>
<center><p style="color:#0A0A1F"><small><i>Clicking on below tool's image will redirect you to the Tools' web page</i></small></p></center>
<div class="Primarycontent" style="width=80%">
<div class="tablecontent">
<table width="100%" align="center">
<tr><td>
<left><A HREF="/jira" target="_blank"><img src="jira.png" title="JIRA - Issue tracking and Project management tool" height="55px" width="130px" border="0" hspace="150" align="left"></left></td>
<td><right><A HREF="/bitbucket" target="_blank"><img src="bitbucket.png" title="Bitbucket - A Git repository management solution" height="40px" width="180px" border="0" hspace="150" align="right"></right></td>
</tr>
<tr><td colspan="2">
<center><A HREF="/jenkins" target="_blank"><img src="jenkins.png" title="Jenkins - Build & Deployment tool" height="120px" width="190px" border="0" hspace="40"></center></td>
</tr>
<br>
<tr><td>
<left><A HREF="/confluence/dashboard.action" target="_blank"><img src="confluence.png" title="Confluence - A Wiki & Team Collaboration tool" height="40px" width="180px" border="0" hspace="150" align="left"></left></td>
<td><right><A HREF="/fisheye" target="_blank"><img src="fisheye.png" title="Fisheye - Revision control browser & Crucible - Code Review tool" height="50px" width="170px" border="0" hspace="150" align="right"></right></td>
</tr>
</table>
</div>
<br>
<br>
<br>
<div class="tablecontent">
<table width="100%" align="center">
<tr align="center">
<td align="left">
<A HREF="/nexus" target="_blank"><img src="nexus.png" title="Nexus - A repository manager tool" height="110px" width="170px" border="0" hspace="150">
</td>
<td align="center">
<A HREF="https://devops-tools.eastus2.cloudapp.azure.com:8443/" target="_blank"><img src="ansible.png" title="SCM Tool - Only for Tools team" height="100px" width="200px" border="0" hspace="50">
</td>
<td align="right">
<A HREF="/grid/console" target="_blank"><img src="selenium.png" title="A Selenium Grid Console - Web Browser Automation tool" height="90px" width="150px" border="0" hspace="150">
</td>
</tr>
</table>
</div>
</div>
</body>
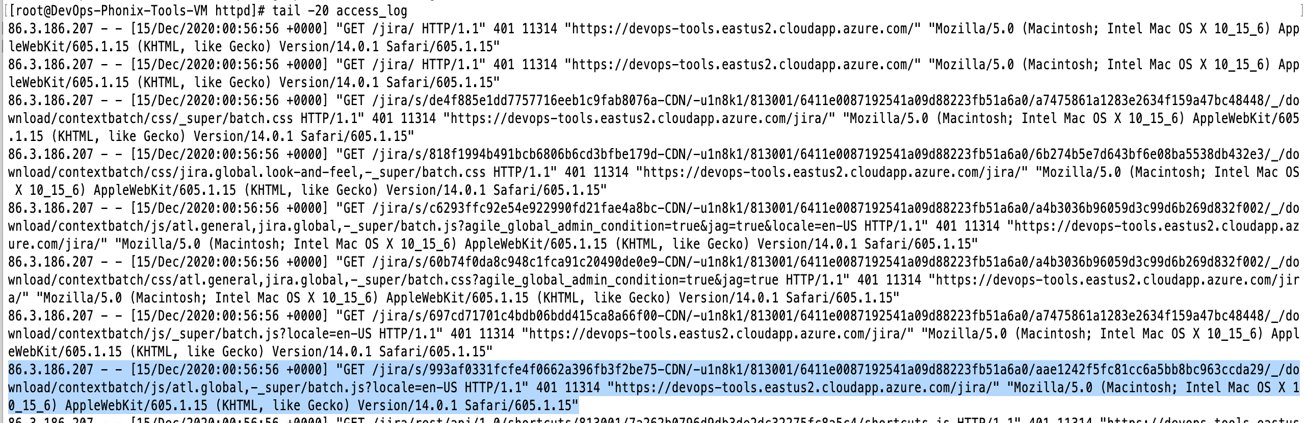
</html>Once all the configurations are completed, restart the httpd server using the service command.
It can track all the activities through the logs for auditing as well.
That’s it. All done!
You’ve now got a single sign-on webpage with SSL/TLS enabled for users to be able to use the same login credentials for all tools and apps in your team/organisation. Happy days! 🎉
Wrapping Up
There you have it – a detailed guide on SSO implementation. I hope you now have a better understanding of how to implement a Single sign-on with SSL/TLS using a reverse proxy or LDAP authentication.
Happy Learning!
If you have any doubts or get stuck on any of the steps above, let us know in the comments below.
It seems very straightforward, I’ll give a try – thnks
Nice share, I am able to configure it 🙂